Self Hosting Part II - Ubuntu Server Installation with PXE Booting
04 Jun 2023On the Self Hosting Part I - Motivation we’ve seen the chosen hardware, the motivation and now everything is set to install the Operating System (OS).
Here my choice was Ubuntu Server, because I am familiar with it, it is stable, there is a huge community and tons of content for doing all sort of things. So I downloaded the Ubuntu Server 22.04.2 LTS ISO on the official website and prepared the pen drive for installation. During the installation though, in the BIOS boot options, I’ve noticed the option "Network 1: UEFI: IPV4 Intel(R) Ethernet Connection", what made me wonder, how difficult it would be to setup a PXE Booting Server to install the OS on the three Lenovo Thinkcentre machines? (spoiler: a lot more than the conventional).

Table of Contents
PXE Booting Network
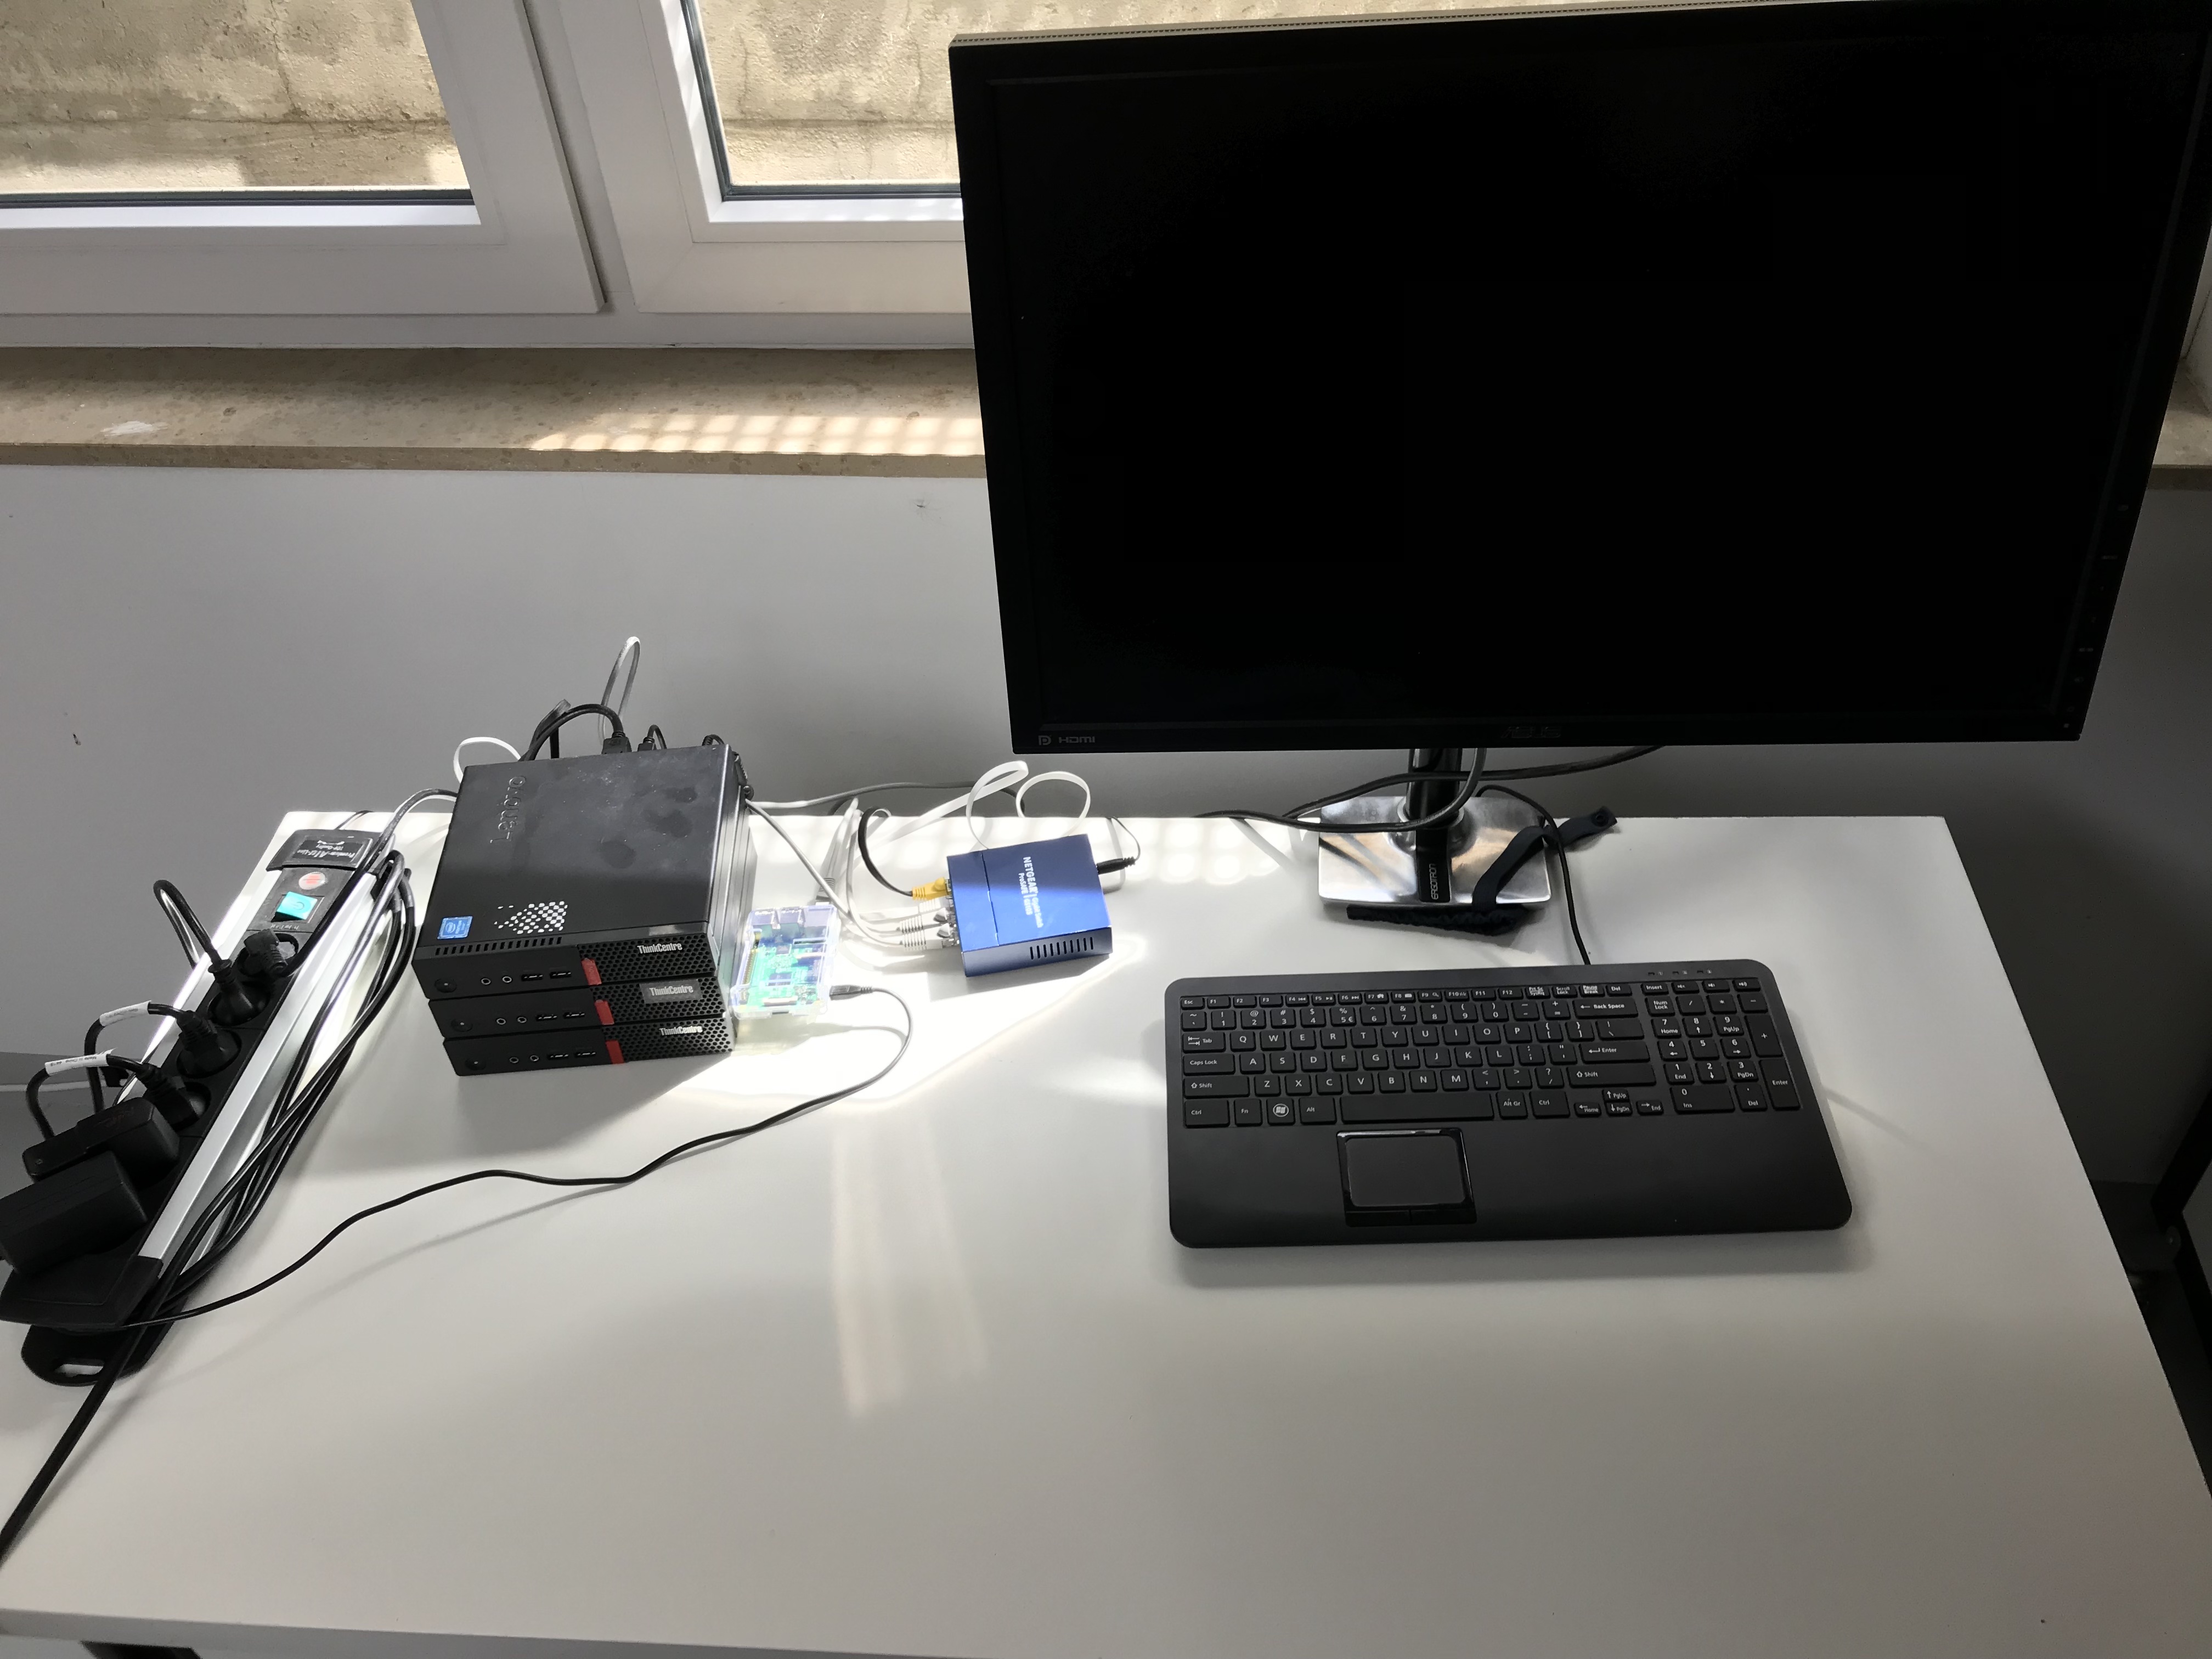
My network layout looks like this:
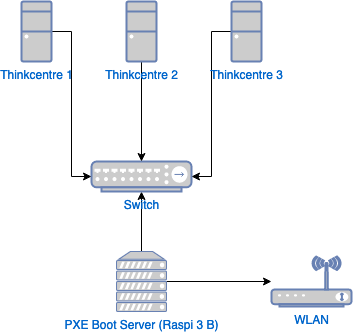
An old Raspberry Pi 3 Model B with Raspberry Pi OS will be setup as the PXE Boot Server. I had an old NETGEAR switch as well that I’ve put into use.
Prerequisites
- Pre Boot Execution (PXE) Server: orchestrates the combination of UDP, DHCP and TFTP on the boot process, so the client can transfer the Network Boot Program (NBP) into its random-access memory (RAM), show that nice initial menu where to choose the desired installation and so on. Note that to do so, the client MUST have a PXE-capable network interface controller (NIC) to initiate this process (like the BIOS picture above).
- Dynamic Host Configuration Protocol (DHCP): a client will startup per network booting sending a broadcast signal on the network, the PXE enabled DHCP server will receive it and then offer a network configuration (IP address, mask, etc) so the client can use it for further communication and data exchange.
- Trivial File Transfer Protocol (TFTP): it has a small memory footprint, uses User Datagram Protocol (UDP) and doesn’t have auth mechanisms, therefore it is ideal for the initial stages of network booting. Note that it is not recommended for transferring big files.
- Hypertext Transfer Protocol (HTTP) Server: after booting the clients will have to download some files to start the OS installation, like ISO images. To do so the server must serve these files through a reliable connection, provided by a protocol like FTP, HTTP, CIFS or NFS. My choice here was HTTP because it will be useful for unattended installation with CloudInit as well.
Installing the Prerequisites
These are the necessary packages to be installed:
- dnsmasq: this package provides network infrastructure and comes with a lot of helpful features for this scenario, providing DNS, DHCP, TFTP and PXE Server integration;
- pxelinux: PXELINUX is a Syslinux derivative. Syslinux is a bootloader for floppy media later extended for network booting and bootable CD-ROMs. This package contains files for a BIOS based bootloader;
- syslinux-efi: contains the bootloader for the Unified Extensible Firmware Interface (UEFI). The UEFI specification defines an interface between an OS and the platform firmware;
- ufw: “Uncomplicated Firewall” for firewall configurations;
- python3: the clients will need to download some installation files (like iso image and auto-install configuration). Instead of configuring an HTTP or FTP server, we’ll use the python’s
http.server; - vim: my predilect text editor.
For my use case just syslinux-efi would be enough, but I am putting together a more generic solution supporting both BIOS and UEFI clients. The PXE server will identify the kind of client automatically and send the correspondent loader.
Let’s get started. Get the latest list of available packages and install the prerequisites
sudo apt-get update
sudo apt-get install dnsmasq pxelinux syslinux-efi ufw python3 vim -y
Enable ufw:
sudo ufw enable
Configuration
File structure
The working directory will be /var/lib/tftpboot, used as the TFTP root directory hosting all the necessary files. For the sake of simplicity, I will keep the HTTP root folder also inside this working directory. You may choose the file structure and naming as you wish, just keep it consistent on the next steps.
sudo mkdir -p /var/lib/tftpboot/{bios,efi64,pxelinux.cfg,www/cgi-bin,boot}
I will set my local user as the owner of this directory, so it won’t be necessary to handle the files as root:
sudo chown -R $USER /var/lib/tftpboot
Copy the necessary files for BIOS and UEFI boot mode:
cp \
  /usr/lib/syslinux/modules/bios/{ldlinux,vesamenu,libcom32,libutil}.c32 \
  /usr/lib/PXELINUX/pxelinux.0 \
  /var/lib/tftpboot/bios

cp \
  /usr/lib/syslinux/modules/efi64/ldlinux.e64 \
  /usr/lib/syslinux/modules/efi64/{vesamenu,libcom32,libutil}.c32 \
  /usr/lib/SYSLINUX.EFI/efi64/syslinux.efi \
  /var/lib/tftpboot/efi64
During the boot process, after the client gets its network configuration from the DHCP, it transfers the NBP into its RAM and boots from it. The client will then request files via TFTP to run a minimalistic OS. These files are:
- vmlinuz: the Linux operating system kernel;
- initrd: a scheme for loading a temporary root file system into memory;
The kernel starts with its network drivers and TCP/IP stack, enabling it to, later on, download the ISO image through HTTP (or another transfer protocol as aforementioned).
Download Ubuntu 22.04.2 ISO image, mount the image, and copy the files vmlinuz and initrd into /var/lib/tftpboot.
wget https://releases.ubuntu.com/22.04.2/ubuntu-22.04.2-live-server-amd64.iso -P /var/lib/tftpboot/www
sudo mount -o loop /var/lib/tftpboot/www/ubuntu-22.04.2-live-server-amd64.iso /media
cp /media/casper/{vmlinuz,initrd} /var/lib/tftpboot/boot
sudo umount /media
dnsmasq
Edit the file /etc/dnsmasq.conf with your prefered text editor:
# Set the interface that will listen for DHCP requests. You can find it with the command 'ifconfig'
interface=eth0

# Don't want dnsmasq messing up with the DHCP wireless LAN Router
except-interface=wlan0

# My static IP for eth0 is 192.168.10.1 / 255.255.255.0, so the range MUST be within the same network.
dhcp-range=192.168.10.10,192.168.10.250,6h

# Enable the built-in dnsmasq TFTP
enable-tftp

# Set the working directory as root folder
tftp-root=/var/lib/tftpboot

# Set the tag "bios" if architecture type 0 (Intel x86PC) is sent by the client
dhcp-match=set:bios,option:client-arch,0

# Set the tag "efi-x86_64" if architecture type 7 (EFI BC) is sent by the client
dhcp-match=set:efi-x86_64,option:client-arch,7

# For clients with the tag 'efi-x86_64' (see dhcp-match), return the filename efi64/syslinux.efi
dhcp-boot=tag:efi-x86_64,efi64/syslinux.efi

# For clients with the tag 'bios' (see dhcp-match), return the filename bios/lpxelinux.0
dhcp-boot=tag:bios,bios/lpxelinux.0

# Enable some logging for troubleshooting
log-queries
log-facility=/var/log/dnsmasq.log
Save the file and restart dnsmasq:
sudo systemctl restart dnsmasq
My Lenovo Thinkcentre M710q broadcasts architecture 7 (EFI BC) during startup (found out by try and error). The following pre-boot architecture types are available (check the RFC4578 for further details):
| Type | Architecture |
|---|---|
| 0 | Intel x86PC |
| 1 | NEC/PC98 |
| 2 | EFI Itanium |
| 3 | DEC Alpha |
| 4 | Arc x86 |
| 5 | Intel Lean Client |
| 6 | EFI IA32 |
| 7 | EFI BC |
| 8 | EFI Xscale |
| 9 | EFI x86-64 |
Configure the firewall allowing the ports:
67/udpfor DHCPDISCOVER broadcast packet containing PXE-specific options;69/udpfor TFTP.sudo ufw allow 67/udp sudo ufw allow 69/udp
CloudInit
CloudInit is a package available in Ubuntu Live Server images that handles early initialization.
At some point of the installation, is would start asking about the desired language, keyboard layout, and so on. With CloudInit it is possible to achieve a really unattended installation using configuration files.
For that we’ll have to create the files user-data and meta-data inside /var/lib/tftpboot/www:
touch /var/lib/tftpboot/www/user-data
touch /var/lib/tftpboot/www/meta-data
For my scenario, I don’t need the meta-data so I’m leaving it empty. The user-data could look like this:
#cloud-config
autoinstall:
  version: 1
  locale: en_US
  keyboard:
    layout: us
  # enable ssh
  ssh:
    install-server: true
    allow-pw: true
  user-data:
    # As I have three machines, I am generating the hostname dynamically.
    # If you don't need it, just set here the desired hostname and ignore the 'early-commands' section
    hostname: HOSTNAME_TO_REPLACE
    timezone: Europe/Berlin
    # ask user to change password after first login
    # password never expires
    # default user 'ubuntu', password 'ubuntu'
    chpasswd:
      expire: false
      list:
        - ubuntu:ubuntu
  # Replace hostname set on this file by noden, where n is an auto increment counter
  early-commands:
    - sed -i -e "s/HOSTNAME_TO_REPLACE/node$(curl -s http://192.168.10.1:8080/cgi-bin/counter.py)/" /autoinstall.yaml
  # storage:
  # use the largest device, 20% for the OS and leave 80% as raw partition
At this point, I had some trouble figuring out how to configure the storage section with the file system layout and partitioning. I’d like to use 20% of the disk for the operating system and leave 80% as an unformatted raw partition (I’m willing to use them as a replicated Kubernetes storage with Rook).
After visiting many forums and a lot of trial and error, I’ve found a useful tip for doing a manual installation. The install wizard creates a user-data file that you can reuse later. My auto-generated user-data and further details are available here.
Boot Menu
Create the PXE default boot menu into the /var/lib/tftpboot/pxelinux.cfg directory:
touch /var/lib/tftpboot/pxelinux.cfg/default
Edit the default file like this:
DEFAULT vesamenu.c32
TIMEOUT 1

MENU TITLE PXE Boot Menu
LABEL Ubuntu
    MENU LABEL ^Ubuntu Server 22.04.2 LTS
    KERNEL ::boot/vmlinuz
    INITRD ::boot/initrd
    APPEND root=/dev/ram0 ramdisk_size=1500000 ip=dhcp url=http://192.168.10.1:8080/ubuntu-22.04.2-live-server-amd64.iso autoinstall ds=nocloud-net;s=http://192.168.10.1:8080/
Further details about the syntax and the structure of a Syslinux menu are available on the SYSLINUX wiki, but here are some important considerations about the configuration above:
- The menu has only one installation option, so TIMOUT 1 will choose almost imediatelly the default OS to install;
- The ^ symbol set the default choice on the menu;
- root=/dev/ram0 specifies that initrd is mounted into the RAM as root;
- ramdisk_size=1500000 is the initial size of the RAM disk to mount the initrd;
- url of the ISO image to install this OS - Ubuntu Server 22.04.2 LTS - so the menu could have a lot of entries with different OSes. Here it points to an HTTP server, but it supports other protocols like FTP and NFS.
- ds stands for “data source” and we are using here the NoCloud data source. The
smeans seedfrom and it must point to a directory containing theuser-dataandmeta-dataconfiguration files.
To use the same menu for both bios and efi64 mode, we can add relative symbolic links to both directories pointing to the same pxelinux.cfg directory:
cd /var/lib/tftpboot
ln -rs pxelinux.cfg bios
ln -rs pxelinux.cfg efi64
HTTP Server
I want a counter to generate unique hostnames for the clients, like node1, node2 and node3.
To do so, I’ll create a text file containing the initial counter as 1, then a python that shows the counter and then increment it.
Create the initial counter.
mkdir /var/lib/tftpboot/www/cgi-bin
echo "1" > /var/lib/tftpboot/www/cgi-bin/counter.txt
touch /var/lib/tftpboot/www/cgi-bin/counter.py
Create the file /var/lib/tftpboot/www/cgi-bin/counter.py with the following content
#!/usr/bin/env python3
# open the file to read and write
f = open("/var/lib/tftpboot/www/cgi-bin/counter.txt", "r+")
# read the current counter value
str_counter = f.read()
counter = int(str_counter)
# increment and override the file
counter += 1
f.seek(0)
f.write(str(counter))
f.truncate()
f.close()
# show the current counter value as plain text
print(f"""\
Content-Type: text/plain

{str_counter}""")
Give the execution permission, allow the port 8080 on the firewall then start the HTTP server enabling the cgi feature.
The HTTP server must be available during the installations, so keep the bash window open and do not press CTRL + C.
cd /var/lib/tftpboot/www
chmod +x -R cgi-bin
sudo ufw allow 8080/tcp
python3 -m http.server 8080 --cgi
All set, so let’s try it! Check the Youtube videos here.