Java gRPC with Gradle in vscode
04 Apr 2020After having some trouble configuring a gRPC Java project with Gradle in vscode I’ve decided to write a post to the future me… here is how I got it working on Mac.
Prerequisites
1) Install Gradle.
2) Install Visual Studio Code.
3) Configure the JDK in vscode as described here.
4) Add the following vscode extensions if you still don’t have them:
- Language Support for Java(TM) by Red Hat
- Gradle Language Support
- Gradle Tasks
- vscode-proto3
Project bootstraping
1) Create a project folder and initiate a Java Gradle project:
mkdir grpc-vscode
cd grpc-vscode
gradle init
2) The Gradle wizard will start and you should select the options:
- 2: application
- 3: Java
- 1: Groove
- 4: JUnit Jupiter
3) Then you’ll be asked for a project name. By default it is the folder name and you can change it as you wish. Next is the source package and I’ve named mine as com.fabiobentoluiz.grpc .
A Java Gradle project with the default structure will be created in your folder.
4) Configure the build.gradle file as described in grpc-java.
I had to add the following dependency as well:
// Some annotations used by the gRPC protobuf genereated code
compile group: 'javax.annotation', name: 'javax.annotation-api', version: '1.3.2'
5) Create a folder named proto inside src/main/, then create the file hello.proto inside it:
syntax = "proto3";
package hello;
option java_package = "com.proto.hello";
option java_multiple_files = true;
message HelloParams {
string firstName = 1;
string lastName = 2;
}
message HelloRequest {
HelloParams param = 1;
}
message HelloResponse {
string result = 1;
}
service HelloService {
rpc Hello(HelloRequest) returns (HelloResponse) {};
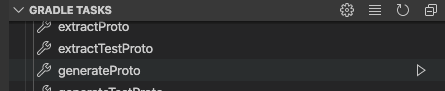
}6) Run ./gradlew generateProto. Alternatively, you can expand the GRADLE TASKS menu on the left side in vscode and run the other > generateProto task.
7) Notice that the gRPC code is generated inside build/generated/source/proto/. We’ll need to reference this code to build the gRPC service, client and server, so add the following in your build.gradle .
sourceSets {
    main {
        java {
            srcDirs 'build/generated/source/proto/main/grpc'
            srcDirs 'build/generated/source/proto/main/java'
        }
    }
}
Here is how the complete build.gradle looks like:
/*
 * This file was generated by the Gradle 'init' task.
 *
 * This generated file contains a sample Java project to get you started.
 * For more details take a look at the Java Quickstart chapter in the Gradle
 * User Manual available at https://docs.gradle.org/6.3/userguide/tutorial_java_projects.html
 */

plugins {
    // Apply the java plugin to add support for Java
    id 'java'

    // Apply the application plugin to add support for building a CLI application.
    id 'application'

    id 'com.google.protobuf' version '0.8.8'
}

repositories {
    // Use jcenter for resolving dependencies.
    // You can declare any Maven/Ivy/file repository here.
    jcenter()
}

dependencies {
    // This dependency is used by the application.
    implementation 'com.google.guava:guava:28.2-jre'

    implementation 'io.grpc:grpc-netty-shaded:1.28.0'
    implementation 'io.grpc:grpc-protobuf:1.28.0'
    implementation 'io.grpc:grpc-stub:1.28.0'

    // Some annotations used by the gRPC protobuf genereated code
    compile group: 'javax.annotation', name: 'javax.annotation-api', version: '1.3.2'

    // Use JUnit Jupiter API for testing.
    testImplementation 'org.junit.jupiter:junit-jupiter-api:5.6.0'

    // Use JUnit Jupiter Engine for testing.
    testRuntimeOnly 'org.junit.jupiter:junit-jupiter-engine:5.6.0'
}

sourceSets {
    main {
        java {
            srcDirs 'build/generated/source/proto/main/grpc'
            srcDirs 'build/generated/source/proto/main/java'
        }
    }
}

application {
    // Define the main class for the application.
    mainClassName = 'com.fabiobentoluiz.grpc.App'
}

test {
    // Use junit platform for unit tests
    useJUnitPlatform()
}

protobuf {
  protoc {
    artifact = "com.google.protobuf:protoc:3.11.0"
  }
  plugins {
    grpc {
      artifact = 'io.grpc:protoc-gen-grpc-java:1.28.0'
    }
  }
  generateProtoTasks {
    all()*.plugins {
      grpc {}
    }
  }
}
8) Create two new packages called client and server.
- client: create the class HelloClient.java. Change the first and last name as you wish;
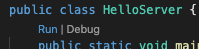
- server: create the classes HelloServer.java and HelloServiceImpl.java.
9) Start the server, then run the client. You should see the “Hello” output with the first and last name that you set on HelloClient.java.
The full project demo is available on github where you can drop any comments and questions.